Sunday, August 17, 2014
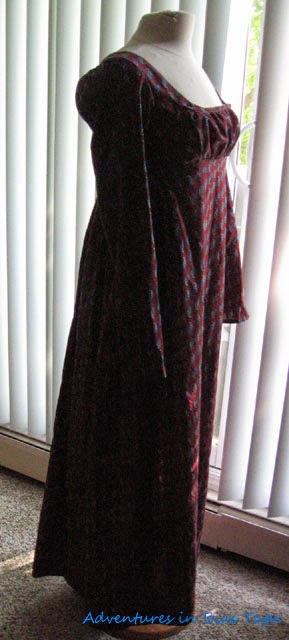
HSF '14: #15 The Great Outdoors: A Regency Spencer
I really like having the challenges posted well in advance, allowing for planning. And procrastinating. And changing my mind because I procrastinated too long. (Have you noticed a theme yet?)
Initially, I wanted to make a riding habit. But I'm not yet confident in my 18th century sewing to have tackled a habit without a pattern. I finally did make a mock-up, but the fit was just awful. I need to spend a lot more time on it, but I don't have a ton of motivation to do so right now.
Lucky for me, sometimes inspiration strikes early and then sits. Case in point: this spencer. I was taken with the idea some months ago: I simply HAD to make a blue cotton velveteen spencer. I HAD to. I found the mockup I'd made ages ago (roughly 3 years ago) and the fit was still good, so out came the pattern and the blue velveteen. In quite short order, I had a jacket. I'm not totally sold on the pale lining (but it's growing on me! A lot!), but I'd already put the sleeves in. Maybe some decorative braiding some such will help perk it up. And of course, I had it finished to the point of closures and sleeve hemming, and tossed it aside in favour of something else. (Carefully. My cat is mostly grey but his fur is banded with white and black too. It clings to and shows up on EVERYTHING.)
I really need to stop doing that.
But then it worked out that since I couldn't finish the habit without rushing, and a spencer would be worn outside, especially with long sleeves... Ta da! It got finished :) It did take a bit longer than I was hoping it to. I came home Friday with the intent to finish it that night, but instead I washed and stored a whole bunch of veggies pulled from a friend's garden (we both came home with about 6 shopping bags of produce, and there's tons more to be harvested :D) and then the next day I woke up with a plague and spent the whole day pretty much sleeping. But today I feel much better, and finished it.
I also ended up hand-stitching the outside seams in place. It was pretty much impossible to photograph (I tried) but the layers wanted to bag out and wouldn't lay flat. Perhaps a good pressing would have done the trick, but I've never had luck with pressing velveteen, even with a towel underneath to protect the pile. I didn't always manage to keep the pale thread from showing on the outside, but hopefully the pile of the velveteen will keep it hidden :) It lays MUCH flatter now.
The Challenge: #15 The Great Outdoors
Fabric: dark blue cotton velveteen
Pattern: Sense and Sensibility Spencer Jacket
Year: 1810s?
Notions: 4 buttons, thread
How historically accurate is it?: In shape only, most likely. Cotton velveteen might be OK, but polyester lining and plastic buttons sure aren't ;)
Hours to complete: I didn't keep track. 6 or so.
First worn: Not yet (too hot!)
Total cost: The velveteen and buttons were gifted to me, and I used maybe 1/2 metre of the cream faux-silk that I got for $2/m... so about $1.
Tuesday, August 5, 2014
Regency Paisley Cotton Day Dress Bonus!!
My sister got married this past weekend at her now-husband's farm, and I had invited my friend with me to attend. Since I had just finished my day dress, and my friend had expressed interest in playing with her DSLR camera more to learn how to use it, I asked her to take some pictures of my dress. I quickly sewed up a chemisette (also from the La Mode Bagatelle pattern) to take with me. I didn't have a chance to hem the ruffle, though you can't really see it in these photos. I feel like my expressions are a bit odd in the photos, and you might notice my SUPER historically accurate chipped nails and flip flops (it was at least 30C and 60% humidity on all the days we were there. I sacrifice footwear when it's that hot. Please understand we spent 6 full months at or well below freezing last year! This kind of heat is just not what I'm used to!). But I hope you enjoy them anyway :)
Friday, August 1, 2014
HSF'14: #14 Paisley & Plaid: Regency Day Dress
There was a bit of excitement in my city this past week! While I am very positive I am not the only historical fashion enthusiast in town, I wasn't sure how to go about finding other people. I have a partner in crime who is quite happy to make dresses and wear them out with me, but we have a hard time getting together sometimes. I am not really interested in the focus groups, and I just don't have the energy to work up to creating a group myself (though I may still have to). Then, we found out that someone in our city is very passionate about Regency and is holding a ball in September! My partner in crime was THRILLED and has leapt into wardrobes with both feet. As it happened, I had a Regency gown planned for the Paisley & Plaid challenge, so I spent the night at her house where we had the unusual but enjoyable experience of making a pair of dresses from the same pattern. Within a 24 hour period, we both had dresses that were only in need of a few finishing touches, such as hems. I finished my dress the next day when I would normally be tempted to let it sit and then finish it right before I wanted to wear it. Sure does feel good to finish something, though!
I feel the need to tell you, lovely readers, that I have never liked paisley. I was probably in my early teens, and a lot of the linens I'd received from my grandparents (being hand-me-downs from the 70s, probably) had these horrible (I thought) paisley prints on them. E-yeuch! And even up until a few months ago, I hated paisley. What an awful motif, I thought. Well, while I'm still not a huge fan, when my mum's stash was available for picking and some paisleys in not-horrible-70s-prints came out, I knew I had a paisley challenge coming up, and I grabbed them for my own stash.
I'd wanted to try the La Mode Bagatelle pattern for some time. I liked that it was a complete wardrobe from the skin out, and was eager to see how it went together. My partner in crime was just finishing a bodiced petticoat as I arrived, and after a bit of pattern tracing, fabric choosing and washing, and supper, we cut our fabrics. I had to make a mock-up bodice, which I then used as the lining.
My partner in crime leapt into the construction with both feet, while I took the time to read the directions, sometimes several times over. I did not find them to be the clearest directions, so if you use this pattern and like to read directions, take the time to read them carefully. Despite that discrepancy in our working styles, we progressed at about the same rate.
We both felt that the band was a great idea, giving the bodice a bit more support to sit under the bust, rather than having the skirt start falling from the same place. We also felt that it was just a little too long, and cut ours shorter to better suit our tastes. I waited to gather my bodice until the false bib was in place, rather than gathering the layers individually. Before attaching the skirt, we added on our sleeves. I know she had to play with the size of the band to achieve the look she wanted, and I ended up taking mine in a bit well after the rest of the dress was completed (but before it was hemmed). After that, it was just attaching the skirt - she kept hers with a flat front and gathered in the back, I pleated mine starting at the edges of the false bib with most of the fullness concentrated at the back.
I took my dress home with only closures, hemming, and finishing the false bib to finish. It was a very productive day! We got through an entire season of Doctor Who as we sewed. And I probably could have pushed a bit harder and had it finished the same day I took it home, but in the end, I worked on it slowly and finished it the day after. Which is still good, I usually wait much longer to finish a dress! I really can't wait to wear this out somewhere :)
What the item is: Regency Cotton Day Dress
The Challenge: #14 Paisley & Plaid
Fabric: 4m of cotton paisley print (60" wide).
Pattern: La Mode Bagatelle false bib-front round gown with long sleeves
Year: 1810s?
Notions: thread, ribbon, self-covered buttons
How historically accurate is it? Probably not very. Fabric content, sure, pattern, maybe. Mostly machine sewn, with hand-finishing on the hems.
Hours to complete: A season of Doctor Who, including patterning.
First worn: Not yet, but hopefully soon!
Total cost: The fabric was from my mum's stash (so free to me), a bit of ribbon and broadcloth from my partner in crime's stash, three button bases left over from my last Regency dress that I got on sale... I'm just gonna call this one free :D (Oh, I will need to buy a bit of tape for the band facing, so it'll be around $1)
And a preview of it being worn! (Apologies for the bathroom selfie and cropping out my laundry-day hair. I broke my full length mirror a few weeks ago. Epic sad-face!)
Sunday, July 27, 2014
In the Mail
Friends, I'm sorry I haven't been posting. I promise I've been sewing, sometimes. If I was half this busy last year, it's no wonder I didn't get anything done and was frantically sewing before the con. I sometimes forget that summer is festival season, and I had the unparalleled delight of seeing Wicked again (if you have a chance to see Laurel Harris in this role, take it! Jump on it like it's running away! She is my favourite Elphaba so far and her rendition of Defying Gravity brought me to tears!). I've been camping and belly dancing and eating my way through the city the last several weeks. Next weekend my sister is getting married and I'm busy sewing up my costume for the con the week after. Phew!
I've got many little projects on the go, and nothing really to show for it. And tonight, I've discovered that the gnomes have hidden the broadcloth I need for a lining that was in my hand not more than four days ago. So, instead I thought I'd show you a couple of items I got in the mail :)
Back in March, Asa of Fashion Through History held a giveaway to celebrate her 100th follower. If you are not reading her blog, you should be! She is so very talented! I entered on a lark, and much to my surprise and delight I was chosen as the winner. The prize was a pair of hand-sewn 18th century mitts in an accent colour of my choice. I received them a few weeks later, but have only just now gotten around to posting about it. At the time, Asa expressed the hope that they would still be useful to me since it was springtime, and as it happened, winter lasted another month past it! I still haven't had a chance to wear them, but I am very much looking forward to doing so in the fall. Thank you so much Asa!
Next up, I have been admiring American Duchess shoes for some time, and just never seemed to have all the ducks in a row whenever I decided that this was the day I was going to order. And not to put too fine a point on it, while footwear is one thing I am willing to spend money on because I can't make it myself, I was still reluctant to spend close to $200 on a pair of shoes that are, to some part of my mind, costume shoes. Still, I kept an eye on the page in hopes of a sale, and finally decided in June that at the next opportunity, I would buy a pair of shoes.
Luckily for me, I was able to jump in on the Bastille Day sale just a couple of weeks ago. The shoes shipped the same day, and I received them just 6 business days later, a bit of a feat from Nevada to somewhat-northern Canada! Good job postal service :)
And, WOW. I'd heard nothing but good things about these shoes, and I am absolutely delighted that they live up to their reputation! For some reason I had pictured the leather being stiff and thick, more like the Victorian-esque granny boots I bought in Virginia City, and it's not. It's soft and supple. I was a little concerned about the width, as I usually have to buy wide-width shoes, but it's not a problem at all. I could probably even go down a half-size as they're a bit roomy in the toe. There is a bit of tightness when I wore modern socks, but it was not over where my foot is wide, but rather over the top of the arch. And it's not even an uncomfortable feeling, just more of a sensation. I also had some misgivings about the heel height, as I have a pair of modern shoes that are slightly higher and are uncomfortably tall after an hour or so, but they are barely taller than the lifts I have to wear in my regular shoes. Really, I can't say enough good things about these shoes! Being as I got them in a sale, I also got some buckles, and wish I had invested in some silk stockings too! And much to my surprise, I found a couple extra goodies in the box too.
As soon as I am able, I will definitely be buying another pair of shoes!

The buckles are surprisingly large. I couldn't figure out a way to show them on the latchets without actually putting them on.
I've got many little projects on the go, and nothing really to show for it. And tonight, I've discovered that the gnomes have hidden the broadcloth I need for a lining that was in my hand not more than four days ago. So, instead I thought I'd show you a couple of items I got in the mail :)
Back in March, Asa of Fashion Through History held a giveaway to celebrate her 100th follower. If you are not reading her blog, you should be! She is so very talented! I entered on a lark, and much to my surprise and delight I was chosen as the winner. The prize was a pair of hand-sewn 18th century mitts in an accent colour of my choice. I received them a few weeks later, but have only just now gotten around to posting about it. At the time, Asa expressed the hope that they would still be useful to me since it was springtime, and as it happened, winter lasted another month past it! I still haven't had a chance to wear them, but I am very much looking forward to doing so in the fall. Thank you so much Asa!
Next up, I have been admiring American Duchess shoes for some time, and just never seemed to have all the ducks in a row whenever I decided that this was the day I was going to order. And not to put too fine a point on it, while footwear is one thing I am willing to spend money on because I can't make it myself, I was still reluctant to spend close to $200 on a pair of shoes that are, to some part of my mind, costume shoes. Still, I kept an eye on the page in hopes of a sale, and finally decided in June that at the next opportunity, I would buy a pair of shoes.
Luckily for me, I was able to jump in on the Bastille Day sale just a couple of weeks ago. The shoes shipped the same day, and I received them just 6 business days later, a bit of a feat from Nevada to somewhat-northern Canada! Good job postal service :)
And, WOW. I'd heard nothing but good things about these shoes, and I am absolutely delighted that they live up to their reputation! For some reason I had pictured the leather being stiff and thick, more like the Victorian-esque granny boots I bought in Virginia City, and it's not. It's soft and supple. I was a little concerned about the width, as I usually have to buy wide-width shoes, but it's not a problem at all. I could probably even go down a half-size as they're a bit roomy in the toe. There is a bit of tightness when I wore modern socks, but it was not over where my foot is wide, but rather over the top of the arch. And it's not even an uncomfortable feeling, just more of a sensation. I also had some misgivings about the heel height, as I have a pair of modern shoes that are slightly higher and are uncomfortably tall after an hour or so, but they are barely taller than the lifts I have to wear in my regular shoes. Really, I can't say enough good things about these shoes! Being as I got them in a sale, I also got some buckles, and wish I had invested in some silk stockings too! And much to my surprise, I found a couple extra goodies in the box too.
As soon as I am able, I will definitely be buying another pair of shoes!

The buckles are surprisingly large. I couldn't figure out a way to show them on the latchets without actually putting them on.
Saturday, July 12, 2014
HSF '14: #12: Shape and Support: Spanish Farthingale
Oh, dear friends, you have no idea how happy I am to post this :D Are you ready for another saga of procrastination? Let's back up a few years...
2008: I wanted to make an Elizabethan outfit. I got... partway. I was, of course, sewing under a deadline, and then, with a few weeks before the event, my dear friend Mew called me about a travel opportunity that I could NOT pass up. I spent the entire time happily planning our trip instead of sewing, and did not even come close to finishing it. (Then our trip didn't happen, and it sucked big time, but that's not a tale for this blog.)
2011: I had quit my job and and spent roughly 6 weeks unemployed. I'd decided that if I wasn't working, I should be sewing. I sewed a lot that winter! Then, mid-late February, I was working on an another Elizabethan outfit, more "casual" than the one I'd started, and I distinctly remember trying to cut bias strips on my mum's freezer while I stayed with her for a day since she was recovering from surgery. I wanted to do a continuous strip and couldn't get them to line up, so I gave up. Both pieces languished.
2014: I've been wanting to get this thing done forever. I have Plans. Then I got "talked" into a group cosplay, where the character I was told to cosplay has a distinctly Elizabethan silhouette. And #12 was coming up. Perfect opportunity, or PERFECT opportunity?
Well, like all my plans, and all of my projects that sit for a long time, the pieces got separated. I couldn't find either one. I was seriously considering just starting over, but then I wanted to use the Simplicity underthings pattern, which I KNOW I have, but it's gone AWOL. I also have the Margo Anderson pattern, but I didn't want to dig it out and trace it off... (Can you see a theme?). But then, while digging in a box for the potential pattern, I found the original base. No sign (still) of the fabric I was making the bias strips out of, but no matter. The base was the important part.
For some reason, when I'd started this, I had the Margo Anderson pattern available. I have NO IDEA what possessed me to try and draft my own, especially when I was reading Margo's instructions and it was based on the same pattern I was using anyway. Sigh. I do like to complicate my own projects... So I made myself some new bias tape, figured out where I would potentially need a hem, so that I could turn up the bottom and apply the bias tape, all before closing up the side seam. Initially I'd left only one side open, and in the end, I opened up the other side seam to apply the waistband more like 18th century petticoats. It just seems more practical than a fixed waistband.
And then... it sat for a few more weeks. I finished applying the bias tape around the same time the challenge was "due", and then I just needed to get my butt to a hardware store so I could pick out my chosen hooping material: flexible plumbing tubing.
I got two rolls of tubing (50ft total) and some copper connecters, and then sat down to put the tubing in the channels. The tubing was great, flexible and easily cut with scissors. It took no time at all to insert it. I still have to close up the channels, but I couldn't resist throwing all the layers onto my mannequin!
Farthingale with Simplicity bumroll...
Taffeta petticoat...
Underskirt/forepart...
Overskirt!
It looks so awesome! I'm so happy!
The Challenge: #12: Shape and Support
Fabric: poly-cotton broadcloth (pretty sure)
Pattern: sort-of drafted by me, based on Alcega's diagrams
Year: 1580s...?
Notions: Thread, self-made bias tape, plumbing tubing, copper connectors
How historically accurate is it? In shape only.
Hours to complete: 4-5? Not including making the bias tape.
First worn: Not yet.
Total cost: $21 CDN, all for the tubing and connectors. Fabrics were all given to me :)
2008: I wanted to make an Elizabethan outfit. I got... partway. I was, of course, sewing under a deadline, and then, with a few weeks before the event, my dear friend Mew called me about a travel opportunity that I could NOT pass up. I spent the entire time happily planning our trip instead of sewing, and did not even come close to finishing it. (Then our trip didn't happen, and it sucked big time, but that's not a tale for this blog.)
2011: I had quit my job and and spent roughly 6 weeks unemployed. I'd decided that if I wasn't working, I should be sewing. I sewed a lot that winter! Then, mid-late February, I was working on an another Elizabethan outfit, more "casual" than the one I'd started, and I distinctly remember trying to cut bias strips on my mum's freezer while I stayed with her for a day since she was recovering from surgery. I wanted to do a continuous strip and couldn't get them to line up, so I gave up. Both pieces languished.
2014: I've been wanting to get this thing done forever. I have Plans. Then I got "talked" into a group cosplay, where the character I was told to cosplay has a distinctly Elizabethan silhouette. And #12 was coming up. Perfect opportunity, or PERFECT opportunity?
Well, like all my plans, and all of my projects that sit for a long time, the pieces got separated. I couldn't find either one. I was seriously considering just starting over, but then I wanted to use the Simplicity underthings pattern, which I KNOW I have, but it's gone AWOL. I also have the Margo Anderson pattern, but I didn't want to dig it out and trace it off... (Can you see a theme?). But then, while digging in a box for the potential pattern, I found the original base. No sign (still) of the fabric I was making the bias strips out of, but no matter. The base was the important part.
For some reason, when I'd started this, I had the Margo Anderson pattern available. I have NO IDEA what possessed me to try and draft my own, especially when I was reading Margo's instructions and it was based on the same pattern I was using anyway. Sigh. I do like to complicate my own projects... So I made myself some new bias tape, figured out where I would potentially need a hem, so that I could turn up the bottom and apply the bias tape, all before closing up the side seam. Initially I'd left only one side open, and in the end, I opened up the other side seam to apply the waistband more like 18th century petticoats. It just seems more practical than a fixed waistband.
And then... it sat for a few more weeks. I finished applying the bias tape around the same time the challenge was "due", and then I just needed to get my butt to a hardware store so I could pick out my chosen hooping material: flexible plumbing tubing.
I got two rolls of tubing (50ft total) and some copper connecters, and then sat down to put the tubing in the channels. The tubing was great, flexible and easily cut with scissors. It took no time at all to insert it. I still have to close up the channels, but I couldn't resist throwing all the layers onto my mannequin!
Farthingale with Simplicity bumroll...
Taffeta petticoat...
Underskirt/forepart...
Overskirt!
It looks so awesome! I'm so happy!
The Challenge: #12: Shape and Support
Fabric: poly-cotton broadcloth (pretty sure)
Pattern: sort-of drafted by me, based on Alcega's diagrams
Year: 1580s...?
Notions: Thread, self-made bias tape, plumbing tubing, copper connectors
How historically accurate is it? In shape only.
Hours to complete: 4-5? Not including making the bias tape.
First worn: Not yet.
Total cost: $21 CDN, all for the tubing and connectors. Fabrics were all given to me :)
Sunday, June 29, 2014
Adventures in: Bias Tape, Level 2: Make Your Own!
When I think of all the things about sewing that seem designed to frustrate me the most, bias tape always seems to top the list. I don't know why. It's easy to use, finishes edges neatly, and makes great decorative touches. I always seemed to be limited to what was in the store, none of which, of course, ever matched whatever project I was working on.
Well, no more! Learning to make bias tape was a great experience, and it's about as easy to do as it is to use. I first looked up these techniques in 2011, when I started working on an Elizabethan farthingale. I'm working on it again, for the next HSF challenge, even though a lot of things are conspiring against me!
As always, I turn to the internet for guidance. When I first started looking at it, it was many, many moons ago. Almost in the dark ages of the internet. At least it seemed that way. Honestly I don't really remember, it was a good 6 years ago now. I found (and still use) Coletterie's fab tutorial, though I don't square off the ends, and instead just line up the straight- or cross-grain sides and sew with a narrow seam (much like this tutorial, which also has an amazing folding technique to get the strips cut. I'm gonna have to try that!) It's very important to make sure, if you're not using fabric with an easily-indentifiable right side, that your strip will end up being, well, a strip, and not a square. Not speaking from experience, or anything (ahem).
I made mine, this time, in a vaguely complicated manner. I have a cardboard cutting board with bias lines marked upon it, so I lined up a selvedge with the bias line and then made a bunch of straight marks (some of which weren't so straight), and cut them out. I started in a corner of the fabric and followed its bias to the selvedge, which was approximately 2 yards long. With 2" spacing, for a 1" finished width, I ended up with about 13 yards of tape! Wowee!
So now I had a very, very, very long strip of fabric. I don't have a bias tape maker. Luckily for me, I found this tutorial on making tape without one. It's probably even easier than using a thingamabobber.
All that's left is to pull 13 yards of bias tape through the pin and press it...
In the space of about 2 hours from when I laid out fabric to when I finished pressing, I had 13 yards of perfect bias tape. It's ready to go on my project!
Well, no more! Learning to make bias tape was a great experience, and it's about as easy to do as it is to use. I first looked up these techniques in 2011, when I started working on an Elizabethan farthingale. I'm working on it again, for the next HSF challenge, even though a lot of things are conspiring against me!
As always, I turn to the internet for guidance. When I first started looking at it, it was many, many moons ago. Almost in the dark ages of the internet. At least it seemed that way. Honestly I don't really remember, it was a good 6 years ago now. I found (and still use) Coletterie's fab tutorial, though I don't square off the ends, and instead just line up the straight- or cross-grain sides and sew with a narrow seam (much like this tutorial, which also has an amazing folding technique to get the strips cut. I'm gonna have to try that!) It's very important to make sure, if you're not using fabric with an easily-indentifiable right side, that your strip will end up being, well, a strip, and not a square. Not speaking from experience, or anything (ahem).
I made mine, this time, in a vaguely complicated manner. I have a cardboard cutting board with bias lines marked upon it, so I lined up a selvedge with the bias line and then made a bunch of straight marks (some of which weren't so straight), and cut them out. I started in a corner of the fabric and followed its bias to the selvedge, which was approximately 2 yards long. With 2" spacing, for a 1" finished width, I ended up with about 13 yards of tape! Wowee!
So now I had a very, very, very long strip of fabric. I don't have a bias tape maker. Luckily for me, I found this tutorial on making tape without one. It's probably even easier than using a thingamabobber.
All that's left is to pull 13 yards of bias tape through the pin and press it...
In the space of about 2 hours from when I laid out fabric to when I finished pressing, I had 13 yards of perfect bias tape. It's ready to go on my project!
Wednesday, June 11, 2014
HSF 10 & 11: Art and Politics of Fashion (The inspirations)
I decided somewhat late that I was not going to participate in the Art challenge. I'd been somewhat iffy on it to start with, since my experiences with historical sewing don't tend to rest with artwork or inspirational images. But earlier this year I did find some art that would be perfect! It would go with the pink dress I finished in January.
I would need to make an apron, neckerchief, shift cuff ruffles, and a wonderfully large hat. But I lacked numerous resources this spring, not to mention my usual habit of procrastinating for far too long. And then I caught my first plague of the year (a sinus cold) and decided that I wouldn't stress myself over a challenge. Not to mention, I live on the Prairies, and while I would be able to photograph my work against a lovely field in harvest, I would have to wait until September or October to truly emulate the painting. While that was not truly a dealbreaker, I took this challenge off the table. Perhaps I will revisit it this summer.
Two weeks ago, as I was relaxing after my usual Saturday morning activities but before I felt ready to tackle the things I needed for Sunday morning, I decided that maybe I would consider working on my challenge for #11. I've had this challenge planned since forever! I'm really excited to start on it. After reading so many blogs and seeing so many lovely variations, I wanted to make my own chemise a la reine.
I hardly need to introduce this gown. There are dozens of recreations, several references images, even a few patterns, and it's been featured in a couple movies too. Sarah of Mode Historique has been posting extensively about this iconic gown since early April, and has a few delightful recreations of her own. Some of my favourite dresses have been made by Katherine of The Fashionable Past/Koska-the-Cat, Asa of Fashion Through History, and Jen of Festive Attyre.
When I was doing the initial research a few months ago, I was a little discouraged. I had the perfect fabric picked out - 4-5m of handkerchief weight linen in a pretty green that I picked up for dirt cheap at a New Year's Sale (previously seen: HSF'13: 25 One Metre). But pretty much every true "chemise a la reine" - that is, the airy dress that is essentially a giant tube and gathered around the neck (waist optional, as it can be held in and controlled with a sash) - has been of white or off-white material. While there are fashion plate examples of coloured gowns, nearly all of them have a fitted back.
I'm still really new to this era, and a lot of the construction is a mystery. How does one construct a fitted-back, gathered-front gown? Jen's black chemise gown was a great inspiration to me - fitted back, with a sense-making front closure, and added bonus, she's collected a great number of fashion plate images on Pinterest. (Side note: I am so thankful and appreciative of the hard work so many of these wonderful women have put forth before me. I've been a long-time admirer of their beautiful work, and I can only hope that someday I can give back to the community in the same way.)
Though I see in the Pinterest plates now, there are a couple examples of loose coloured gowns, I am still aiming to construct a fitted-back gown. Mostly because I have been preparing for this for several months and I am eager to work on it in the way I've planned :)
My biggest obstacle so far has been trying to decide how to pattern the front. It seems pointless to put gathers all the way under the arm, so how does one control that? I'm taking inspiration from an adorable pierrot jacket that I unfortunately can't find the reference for, which is smooth under the arms, and only the front section is gathered.
Also an inspiration is this REDONKULOUSLY cute dress at the Glasgow Museums - Collections Navigator. This type of gown was the precursor of the transitional "round" and later Regency gowns, so this kind of construction makes sense. It seems very similar to this 1786 fashion plate. I don't have enough fabric to make a separate petticote, though, so I will be making a closed-skirted, front-gathered, fitted-back "round gown".
As of this posting, however, it's only a few days until the challenge deadline, and I probably won't make it in time. You see, I just went to my grandmother's memorial, and brought a cold back with me. I feel pretty rotten, but it's only started to settle in today, so we will see how the rest of the week goes. But it's also coming up on dance-recital time, which I need a costume for, visiting my other grandparents (hopefully) whom I haven't seen since last October, and planting a forest in memory of my friend Shell, all before Sunday. One of those weeks where things are just conspiring, you know how it goes. I will get it done sometime :)
Edit 6/12/14: Wouldn't you know it, that I would find my inspiration item the day after I posted that I couldn't find it?
I would need to make an apron, neckerchief, shift cuff ruffles, and a wonderfully large hat. But I lacked numerous resources this spring, not to mention my usual habit of procrastinating for far too long. And then I caught my first plague of the year (a sinus cold) and decided that I wouldn't stress myself over a challenge. Not to mention, I live on the Prairies, and while I would be able to photograph my work against a lovely field in harvest, I would have to wait until September or October to truly emulate the painting. While that was not truly a dealbreaker, I took this challenge off the table. Perhaps I will revisit it this summer.
Two weeks ago, as I was relaxing after my usual Saturday morning activities but before I felt ready to tackle the things I needed for Sunday morning, I decided that maybe I would consider working on my challenge for #11. I've had this challenge planned since forever! I'm really excited to start on it. After reading so many blogs and seeing so many lovely variations, I wanted to make my own chemise a la reine.
I hardly need to introduce this gown. There are dozens of recreations, several references images, even a few patterns, and it's been featured in a couple movies too. Sarah of Mode Historique has been posting extensively about this iconic gown since early April, and has a few delightful recreations of her own. Some of my favourite dresses have been made by Katherine of The Fashionable Past/Koska-the-Cat, Asa of Fashion Through History, and Jen of Festive Attyre.
When I was doing the initial research a few months ago, I was a little discouraged. I had the perfect fabric picked out - 4-5m of handkerchief weight linen in a pretty green that I picked up for dirt cheap at a New Year's Sale (previously seen: HSF'13: 25 One Metre). But pretty much every true "chemise a la reine" - that is, the airy dress that is essentially a giant tube and gathered around the neck (waist optional, as it can be held in and controlled with a sash) - has been of white or off-white material. While there are fashion plate examples of coloured gowns, nearly all of them have a fitted back.
I'm still really new to this era, and a lot of the construction is a mystery. How does one construct a fitted-back, gathered-front gown? Jen's black chemise gown was a great inspiration to me - fitted back, with a sense-making front closure, and added bonus, she's collected a great number of fashion plate images on Pinterest. (Side note: I am so thankful and appreciative of the hard work so many of these wonderful women have put forth before me. I've been a long-time admirer of their beautiful work, and I can only hope that someday I can give back to the community in the same way.)
Though I see in the Pinterest plates now, there are a couple examples of loose coloured gowns, I am still aiming to construct a fitted-back gown. Mostly because I have been preparing for this for several months and I am eager to work on it in the way I've planned :)
My biggest obstacle so far has been trying to decide how to pattern the front. It seems pointless to put gathers all the way under the arm, so how does one control that? I'm taking inspiration from an adorable pierrot jacket that I unfortunately can't find the reference for, which is smooth under the arms, and only the front section is gathered.
Also an inspiration is this REDONKULOUSLY cute dress at the Glasgow Museums - Collections Navigator. This type of gown was the precursor of the transitional "round" and later Regency gowns, so this kind of construction makes sense. It seems very similar to this 1786 fashion plate. I don't have enough fabric to make a separate petticote, though, so I will be making a closed-skirted, front-gathered, fitted-back "round gown".
As of this posting, however, it's only a few days until the challenge deadline, and I probably won't make it in time. You see, I just went to my grandmother's memorial, and brought a cold back with me. I feel pretty rotten, but it's only started to settle in today, so we will see how the rest of the week goes. But it's also coming up on dance-recital time, which I need a costume for, visiting my other grandparents (hopefully) whom I haven't seen since last October, and planting a forest in memory of my friend Shell, all before Sunday. One of those weeks where things are just conspiring, you know how it goes. I will get it done sometime :)
Edit 6/12/14: Wouldn't you know it, that I would find my inspiration item the day after I posted that I couldn't find it?
Subscribe to:
Posts (Atom)
1770's Riding Habit
I'm not precisely sure when I decided that I needed a riding habit, but once the idea was there, it needed to happen. It's been on ...
-
I really like having the challenges posted well in advance, allowing for planning. And procrastinating. And changing my mind because I proc...
-
Phew, this gown is taking a really long time! I've been really excited to work on it all month and I have been whenever I've had fre...
-
Shortly after David Bowie's death earlier this year (I won't go into how much his death affected me -- I "met" him at all ...