Last summer, after I knew that I needed a riding habit shirt for Costume College, I started researching them. I say "research"... it was a very unscientific search, consisting mostly of bloggers who've already made them. There's known examples at The Hereford Museum and Art Gallery, which was the basis for the pattern by JP Ryan. At the time, I didn't want to spend the money on a pattern plus shipping, which is so expensive to Canada, and then exchange rates, which are terrible, and possibly customs fees. I would have been paying at least $40 Cdn, JUST for the pattern. Ouch!
So I hunted down made ones. Here is a not-complete list of bloggers who've made habit shirts:
American Duchess
The Fashionable Past
Diary of a Mantua-Maker
Ruffles not Rifles
Couture Mayah
A Fractured Fairytale
Before the Automobile
Look What I Made
Reconstructing History
From these, I gleaned measurements, and created the best set I could come up with. I had some linen leftover from my shift, but a limited amount. With guidance about mens' shirts from Costume Close-Up and La Couteriere Parisienne, I decided on the best use of what linen was left, and then took a deep breath and cut it out.
In the interest of following these lovely ladies' footsteps, I cut my linen so:
Body: 24" Wide x 30" long, split 16"/14" Front-Back, split CF to neck, and slit 12" in the center (6" on either side of CF)
Sleeves: 15" wide x 23" long
Sleeve gusset: 6" square
Neck Gusset: 3" square
Collar: 16" x 5"
Cuffs: 8.5" x 3"
I purposely did not cut ruffles. If I choose to add them, they often would have been cut from a nicer material than the rest of the shirt, and I was so limited on fabric. These measurements include 1/2" seam allowances. (But for real, if you struggle with creating a pattern, JP Ryan's habit shirt pattern is wonderful!!)
I know I started the reasearch while I was on vacation in early June, but I don't think I actually got started until after I got home again. While on vacation, I took the sleeves off of my shift and narrowed and shortened them. Some of the habit shirt pieces got cut out of the those scraps. Sewing with linen is so lovely, so I opted to do it all by hand. Everything was going well, and in early July I thought I actually had a chance at having it ready and wearable for Costume College!
Until... I put in the neck gussets upside down. I had folded the little gusset squares in half and attached the raw edges to my neck slits, opted not to flat-fell the seams, gathered the neckline and attached it to the collar, AND sewn the collar down. I figured that the seams would be on the inside, and then I could flat-fell them down after CoCo. When I went to try it on, that's when I noticed that the raw seams faced UP for the whole world to see. Argh! I also wasn't happy with the fit -- I'd made a channel for the back waist to gather through, which made it feel weird around the shoulders and center back, and made it ridiculously short (the tie would have gone VERY high around my torso), plus one cuff was a lot bigger than the other. I was discouraged and put it in the Naughty Pile. I took a modern dress shirt to CoCo for my habit class instead.
While at CoCo, I picked up JP Ryan's habit shirt pattern in the marketplace. She'd had a couple on display and one for sale that was purchased by another attendee, and they were all BEAUTIFUL, so I wanted to pick it up if I could. Exchange rates were still terrible, but at least I didn't have to pay for shipping, and guaranteed no customs fees! I read the directions a few times, intending to get more linen and start over, all while thinking that my original attempt could be salvaged for something else.
Sometimes it's lucky that it takes me forever to decide on stuff. Finally, towards the end of 2017, I decided that I really wanted to put some serious thought into getting the riding habit done. I'd picked up some quilted silk in LA to make into a petticoat (done in September), to wear under the habit petticoat, and while I could get the petticoat done as soon as I find the fabric in my stash, I still needed the habit shirt done before I could commit to fitting the waistcoat or jacket.
And then it kinda fits into this month's Historical Sew Monthly 2018. I WAS going to relegate this project to "salvage fabric", but then concluded that I could just... mend it. Take apart the offending fit issues and re-shape it, the right way. And so I did.
The pieces came off very easily - hooray for handsewing! I even could have salvaged most of the thread (I didn't, but I could have). The collar, neck gussets, back hem, and longer cuff were all removed within an hour. I made sure to put the neck gussets on the proper side, and this time flat-felled them down. I reused my gathering thread to gather the neckline back onto the collar, and finished that area up. The back got its small seam allowance turned in and tacked down, and some small pleats taken at the centre back to narrow it a bit. That will get tacked to a tie when I can pick up some narrow twill tape. Finally, I cut almost 2" off the cuff (what was I thinking the first time??) and reattached that. All told, the alterations took 3 hours of hand sewing time to reattach, and I was back to where it had been when it went on the naughty pile.
Next up I had to figure out my button situation. JP Ryan and her assistant, Feather, had had some pre-made Dorset buttons for sale at the class, but I had lacked any cash to buy them. They can be purchased from Wm, Booth, Draper, but for a variety of reasons, this isn't an option right now. I couldn't bring myself to use modern plastic buttons, I just couldn't. So I looked up how to make Dorset buttons and made some, using modern embroidery floss and the rings that I had pulled off of the tie-backs that had come with the curtains for my curtain-along dress. The rings were just slightly larger than the 1/2" ones recommended by JP Ryan, so I went with it. I used this tutorial to create them. I had trouble getting 8 even spokes around the ring, but I ended up liking the odd-number spoked buttons better. Each button took around 20 minutes to make (timed while I was watching Forensic Files -- one button per episode).
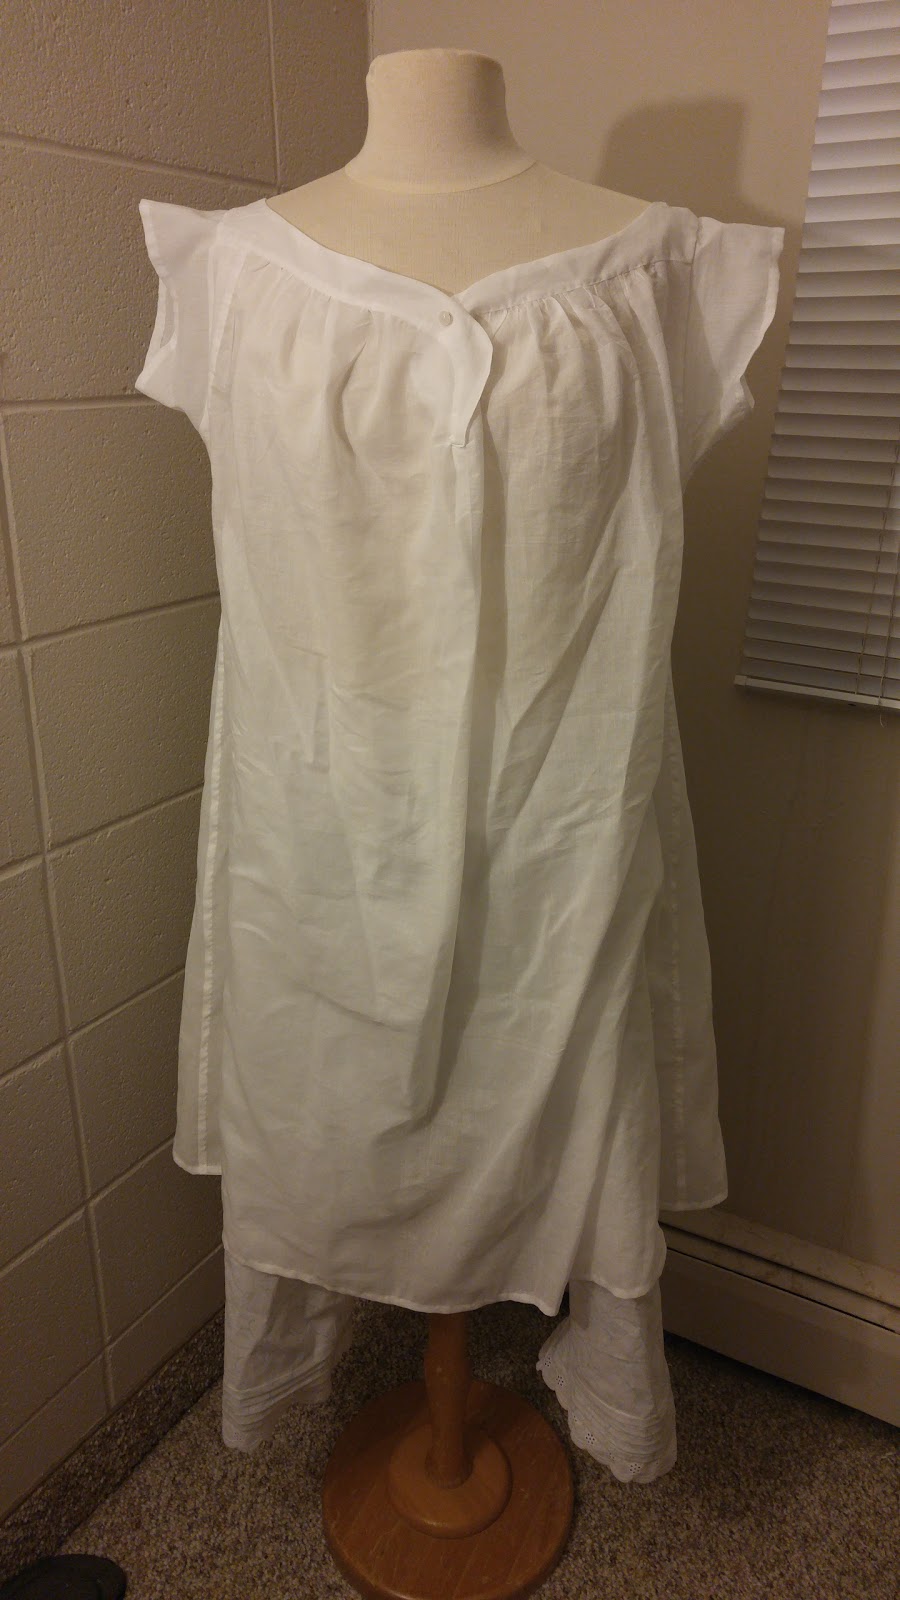
Finally, I made buttonholes on the cuffs and collar of the shirt, and attached my buttons. Aside from the tie and some kind of cravat or stock, my habit shirt is complete!