Monday, September 3, 2018

The Victorian Wallpaper Cotton Sacque

I hope you're ready for a long post about a long project, readers. Grab a beverage and settle in :D


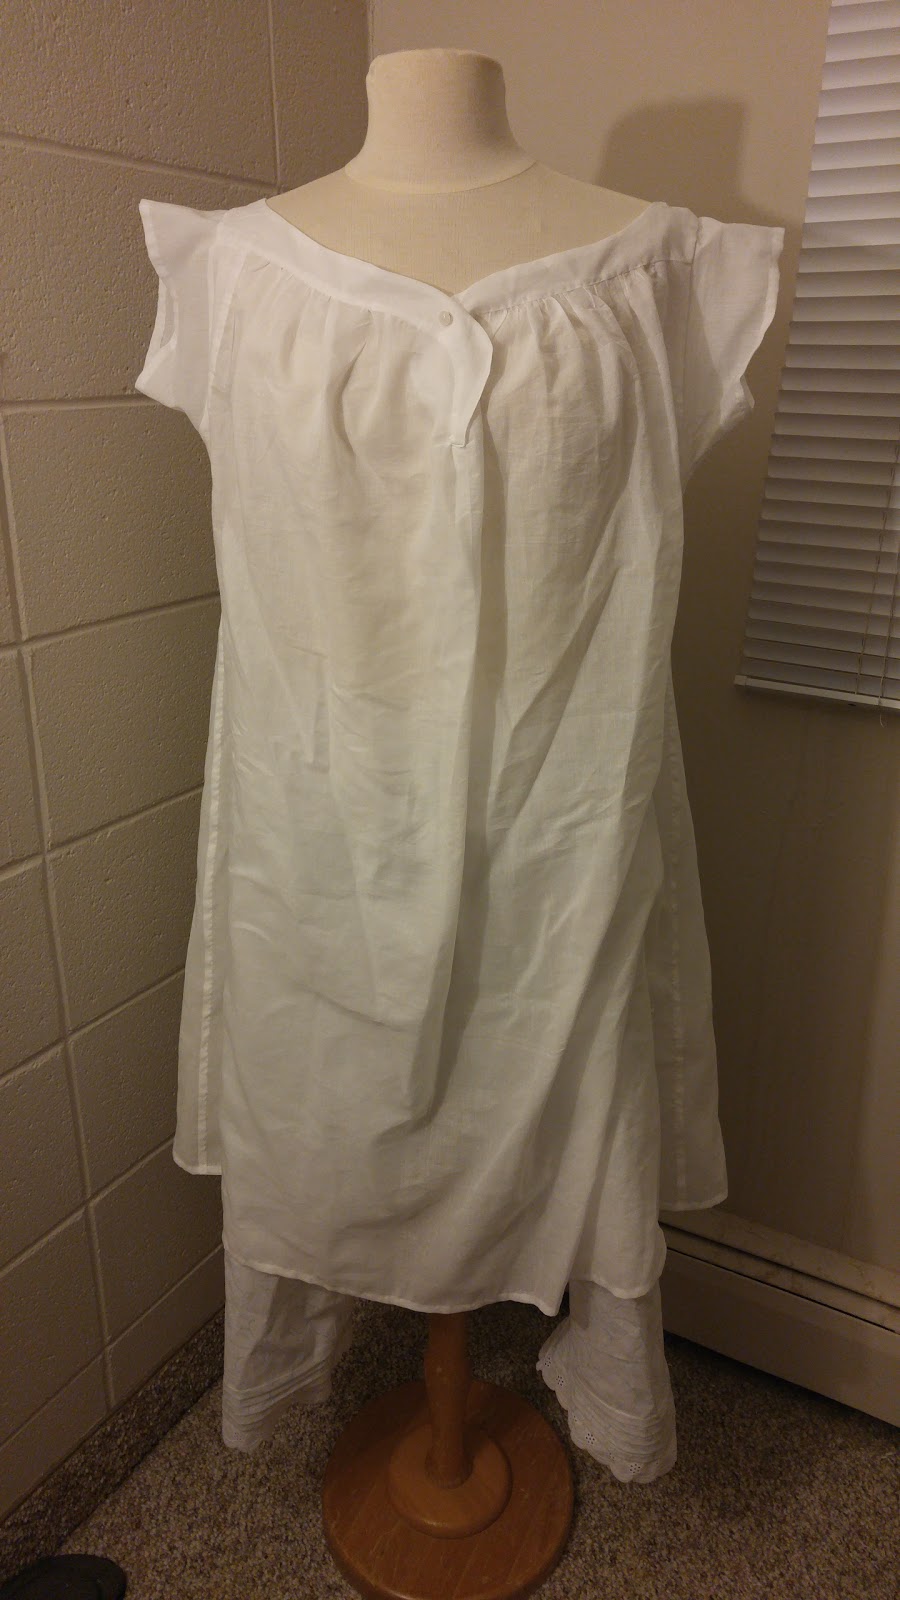
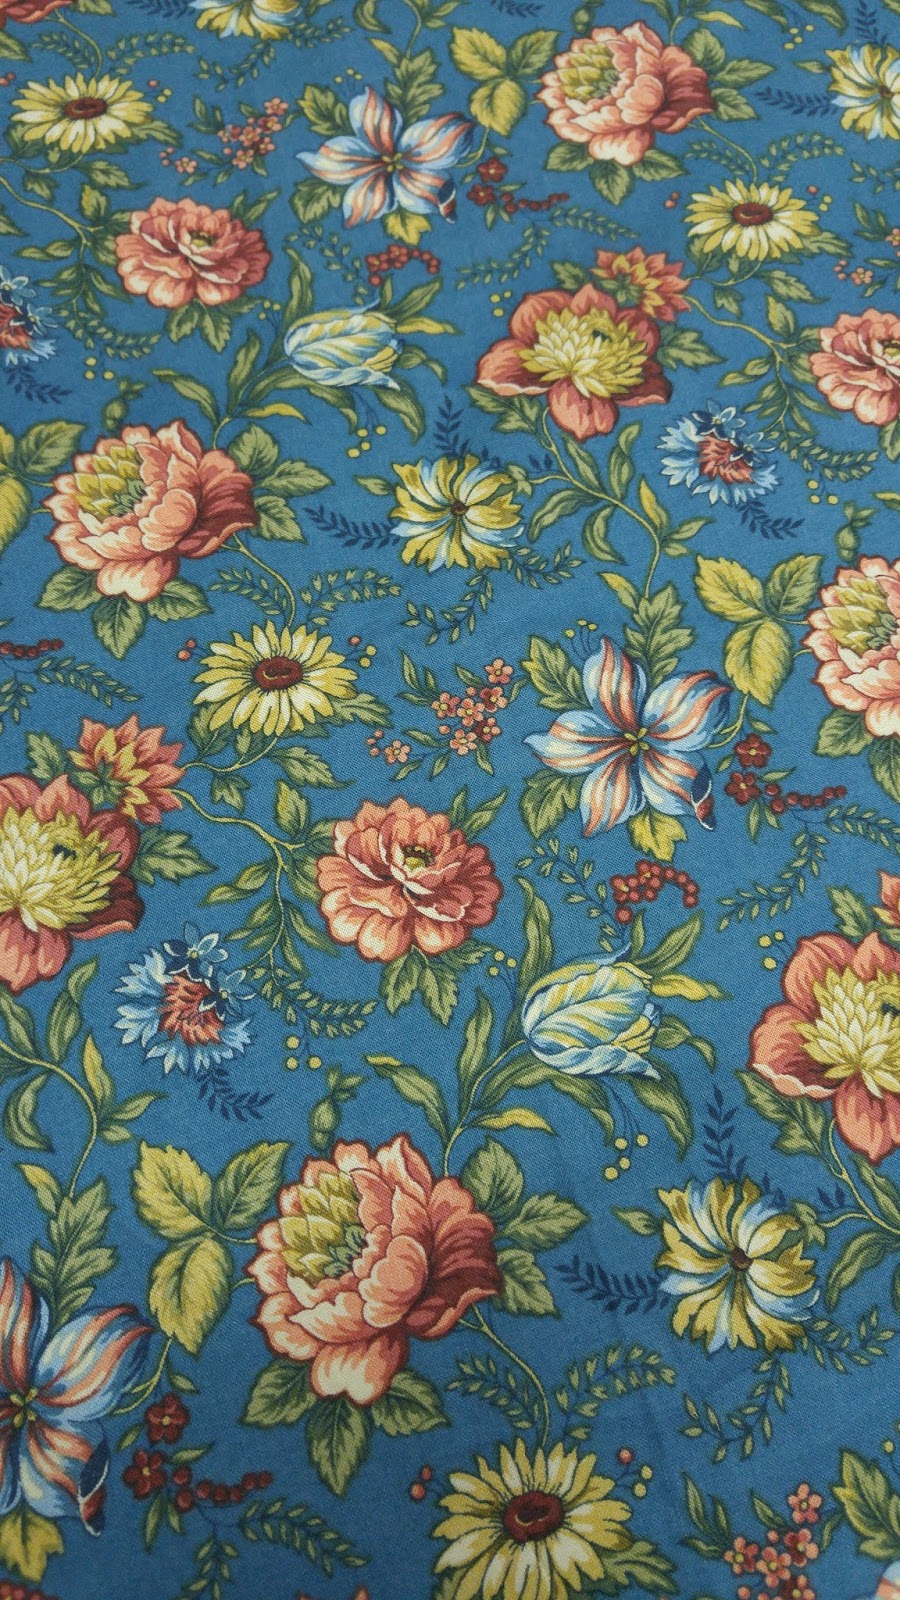
When my mum was destashing in early 2014, I grabbed this striped fabric with the specific intent to make a sacque (aka a robe a la francaise or sack). I washed it soon after, and then it sat. And sat and sat and sat and sat forever. I made pocket hoops a month later, and that's as far as the project ever got.


Within a month of Costume College 2017, I decided the time was now. I had bought a bunch of silk for a sacque in the fabric district, but I was too scared to cut into it without some experience under my figurative belt. So I felt that if I made the cotton one first, I would feel much more confident about starting the silk one! I first made a linen lining, using my modified RH 822 as the pattern. Then I cut a single panel of the cotton and started to drape it on my lining, referencing Katherine's sacque tutorials as a guide. I was pretty happy with how it looked, and then got stalled on how to do the sides over the pocket hoops. The project got put aside, and sat.


In the end I'm really glad it waited so long. The American Duchess Guide to 18th Century Dressmaking came out at the end of November, and I read it back to front numerous times. Especially the section about the sacque gown. The directions indicated a width of at least 80" across the back. It seemed like a lot! I was also thinking about how to arrange the pieces on my silk, and how to deal with stripes? I couldn't cut a gore off and flip it to the other side of the side skirt, with either fabric, they are both striped! How to deal with that? Then, the Simplicity pattern was announced, and I was thrilled.

It took a couple months to arrange getting the pattern, but it did happen eventually. I finally, finally got set to really, really commit to make the gown this time. 80" of fabric in the back and all. Even if the fabric reminded me a bit too much of Victorian wallpaper to "pass". Indecision is my biggest nemesis, and I just needed to Get It Done.

I started by measuring my fabric. I had 8 yards of 42" fabric. The pattern envelope indicated I would need nearly 11 yards of 45" fabric, and that didn't include a petticoat, which I wanted. I carefully saved all of my scraps to see how much I would have left, and also because I may need them. Piecing is period, after all! Another reason to keep track of how much I had! I also wanted to make note of this especially because I felt it was important for people like me who can't get silk easily or inexpensively.

I sat down one late winter's day to make a mock-up. I always cut my Big-4 patterns one size smaller than the envelope says I need, and this one was no exception. I wasn't totally happy with it - too wide across the chest, too loose shoulder-to-bust (a normal occurrence, for me). I took the excess shoulder length out in a tuck from the strap, but I disliked that even more! It was now too tight under my arm and I couldn't put my arms forward much, plus the back neck now sat really high! Ugh! I took a day and a half to read about various adjustments one can make to a pattern - the one I see most is a full-bust adjustment, but what I really needed was a small-bust adjustment. I decided to give it a try, and the short version -- it worked. Back sitting where it was supposed to, full arm motion, including forward, only a tiny bit of excess over the chest. I'll put up a post explaining how I did it, link to follow!


Mock up #1. Notice the waves of fabric over the shoulder...


SO much better!


From there it was full speed ahead! I put on some Netflix and got started. I used my initial single-width panel that had the armscyes cut out (one would be in the centre back but I would fill in whatever wasn't covered by the pleats with a scrap) and laid it out on top of the yardage. I chose to cut the back pieces as one large piece rather than 2 separate ones. The print was directional, so for the main pieces I was careful to make sure the print went in the same direction. I cut, pinned, sewed, fitted, etc, over the course of a few weeks, and I can't believe I ever thought a single 42" wide panel was enough for the back. Look at this beauty:


I used a combo of machine and hand stitching. Major seams were done by machine where the stitches wouldn't show. In a few cases, I did machine stitch visibly, knowing or intending to cover it with trim in the future. Visible stitching was done by hand. I had cut my front skirts and bodice without checking placement of the print, and got it HORRIBLY wrong. I HAD to re-cut it:

Pattern lining up FAIL 😱😱😱 I'm recutting these... #sewing #sacque

A post shared by Crystal (@totchipanda) on


I did re-use the front bodice pieces to cut my stomacher. They only fit at an angle, but I quite like the chevron effect :)


As I got towards the end of my fabric, I had to plan. I did not have enough for a full self-fabric petticoat. I cut a single panel for the petticoat and two 12" strips to have a back hem, and then I was down to 27" of fabric left. I planned 6 3" strips for the front trim, but I waited to rip them, and good thing. My petticoat ended up being too long, and I ripped 4" off the front! I trimmed that down to 3" for one of the trimming strips.

The trimming took a long time, of course. I machine-hemmed both edges with my roll-hemmer foot, a device that is still a mystery to me. It was starting to get better by the end (I made a lot of hems over the summer with this foot), but I had done it this way because I KNEW someday it would get covered by trim. I had looked at a lot of sacque gowns in museums and such while I was planning, and the cotton ones, while trimmed, always had some kind of bling on their edges. But I also knew I couldn't wait to find the perfect trim, or else the strips would never get made, so I forged ahead. It took a LONG TIME (2 seasons of Call the Midwife, in fact) to get the strips gathered up. It took the first part of Moana to get them ironed, and then some more TV (I forget which, now) to get it all attached. I couldn't quite get it gathered up at my intended ratio, but I only have about 15" left over. And it looked GREAT!


Because I was using quilting cotton, I planned the back neck to be covered in trim. The fabric was stitched and the raw edges trimmed with pinking shears. The ruffle covers it.

Then it was on to the little bits! The sleeve fluffles had been hand-hammed, but I machined the gathering lines and attached by hand. I hate how visible the stitching is, but someday I will cover it. By the time I got around to that, my hands were giving out on me; I just couldn't manage fine handwork. It had to do. I machine-gathered lace and stitched it to a bias tape, then hand-stitched it to the neckline. For the linen fluffles, I used the trusty roll-hemmer (by this time, I had made another project with it, and the stitching on these is the best yet!) and then gathered some lace and stitched it on top (again by machine). It was gathered to a bias tape, and first I had put the fluffle in backwards. It looked weird! Once I got it on the correct sleeve, it was perfect. Except I had accidentally cut the biggest size fluffle, and had to attach it very far up the sleeve to keep it at a not-ridiculous-looking length.


I realized after this photo that the fluffle was in the wrong way!

The last bit I needed for Costume College was some bows. The night before we left, I cut three strips of golden yellow poly taffeta from my partner's stash with pinking shears. They would get done in the hotel, and they did. I put one on each elbow, and three down the stomacher, just pinned in place for now. I really enjoyed wearing it. Many people complimented my fabric, and I heard one exclamation of "pretty!!". Regrettably, I did not get any full-length shots of the outfit being worn.


In the fashion district, I found some cute floral trim. I calculated how much I thought I would need (6 x 90" as an overestimation of the strip trim, which worked out to 15 yards, so I bought 20) and shortly after arriving home, started to attach it. It really adds something to the visual interest, but now I want to add more! I think the centre of the strip needs a little somethin'-somethin' too ;) Maybe in pink or purple to pull out the flowers?


And here is all of the fabric I have left. If you want lots of trim, a fully matching petticoat, etc, you will need more fabric than 8 yards (also if you are taller than me!). But if you plan carefully and keep it conservative, you can save a little on yardage.

Sunday, July 8, 2018

Road to Costume College 2018

Gosh, where did the first half of the year go? (I know where, winter was unusually long and dark and cold, and it's effect lasted longer than usual...) Now that the days on the calendar are quickly ticking down to the dates I will be in LA attending Costume College, its starting to really sink in that it's happening, and SOON!

I've been pushing to get some pieces made up for the event, even though it's SO VERY SOON now. If you follow me on Instagram, I've been posting progress shots of my current projects. Here is what's on my to-do list, with bonus planned costume list for the weekend!

Thursday:

Jareth the Goblin King


-need to reglue approximately 600 jewels back on.

Friday Day:

IKEA Ljusoga Italian gown

I made a split rump to go under this, and plan to redo the sleeves. If I have time, I may make another new petticoat. I really want the ruffly apron from the American Duchess Guide, but as I don't have fabric, I don't think I'll have time to create it.

Bonus: This is the only outfit that will have a hat. I finished-finished my market bonnet earlier this year and since it packs flat, it's the only hat I'm bringing along!


-Redo sleeves
-Cap

Friday Night Social:

Riding Habit

This is at least 75% done. I recently got the buttons I needed to put this on. I've misplaced the hooks & eyes I bought in LA last year to close it with so it might get temporary ones. I don't know what I'm going to do with my hair, either D:


-Buttons! Buttons for days!
-Waistcoat buttonholes + buttons
-Attach lining to jacket
-Hooks & eyes (possibly temp)

Saturday Day:

1830s cotton gown

Purely as a companion to Lady Rebecca's 1830s fabulousness, I got this amazing pink and yellow print from my mom's destash in early 2014. I always intended it for an early Victorian gown. I have 6 yards, so I may need to get creative when it comes to the sleeves. I'm using the Workwoman's Guide (1838-1840) as a huge source of patterning, and several gowns from the Met as design choices.


I'm using Laughing Moon's Regency stays pattern to make long stays. I'm using the theatrical version, as this is a pattern I mostly want "done" rather than "historically". Stays didn't change a lot for the first 30-odd years of the 19th century. You see the same shapes in the Workwoman's Guide with similarly styled boning patterns and advice for boning it as little as possible. For the dress I'm going to use Butterick's 1840 dress pattern as the bodice base, but this time I've modified the front with a small bust adjustment rather than taking the extra fabric out near the shoulders. I'll talk about that more in an upcoming post.

I will also need a cap to cover my hair, and an apron. I got into a limited class on Saturday morning which will be hands-on, and I also just really love aprons!

-Stays: boning channels
-Stays: boning
-Stays: Binding
-Gown: everything. Sleeves are patterned and bodice pattern adjustments made, but that's it.
-Gown: Sleeve support (maybe)
-Cap


Saturday Gala:

LACMA Redingote

I'm really excited about this one. I won't go into too many details since I have a post or two in the works already, but I started on this project last year shortly after CoCo, and it sat for months and months before I came back to it. It's my first time working with real silk, and I made a few choices I maybe wouldn't have made if I had waited just a bit longer (or maybe I would have; they certainly didn't occur to me at all until it was too late). I 'm hand sewing this partly because I have time to do so (I feel), partly because I enjoy the process, partly because I like the look, partly because I just plain wanna.

One of the main features I loved about the extant garment is the shoulder capes, but they will be the last constructed as they are not integral to the garment in the way that sleeves are.

A post shared by totchipanda (@totchipanda) on


-Main sewing (lapels, collar, sleeves, cuffs)
-Buttons
-Hemming
-BIG FLUFFY CAP
-capes

Sunday:

Victorian Wallpaper Sacque

I started this last fall too. The fabric also came from my mom's destash, and had always been intended for a sacque. I had initially started out with the same lining pieces as for my Italian and curtain-along gowns, with hand-sewn eyelets, and I was using Katherine's sacque tutorials as a guide. For whatever reason, it also got put aside for months.

The Lady Detalle is hosting a "Dress of WRONG" on Sunday, perfectly accurate gowns with imperfectly accurate fabric. Mine will be less obvious than hers, but this fabric has always felt a little too "Victorian Wallpaper" to be an appropriate sacque. But I also really love it still, and when I got a copy of American Duchess' Simplicity pattern early this year, it was just a thing that needed to be Done.

This also features a small bust adjustment, so stay tuned for that.


-Sleeve fluffles (inner and outer)
-Cap
-Bows for days!

Sunday, January 21, 2018

HSM '18: January: Mend, Reshape, Refashion: Riding Habit Shirt


Last summer, after I knew that I needed a riding habit shirt for Costume College, I started researching them. I say "research"... it was a very unscientific search, consisting mostly of bloggers who've already made them. There's known examples at The Hereford Museum and Art Gallery, which was the basis for the pattern by JP Ryan. At the time, I didn't want to spend the money on a pattern plus shipping, which is so expensive to Canada, and then exchange rates, which are terrible, and possibly customs fees. I would have been paying at least $40 Cdn, JUST for the pattern. Ouch!

So I hunted down made ones. Here is a not-complete list of bloggers who've made habit shirts:

American Duchess

The Fashionable Past
Diary of a Mantua-Maker
Ruffles not Rifles
Couture Mayah
A Fractured Fairytale
Before the Automobile
Look What I Made
Reconstructing History

From these, I gleaned measurements, and created the best set I could come up with. I had some linen leftover from my shift, but a limited amount. With guidance about mens' shirts from Costume Close-Up and La Couteriere Parisienne, I decided on the best use of what linen was left, and then took a deep breath and cut it out.

In the interest of following these lovely ladies' footsteps, I cut my linen so:

Body: 24" Wide x 30" long, split 16"/14" Front-Back, split CF to neck, and slit 12" in the center (6" on either side of CF)
Sleeves: 15" wide x 23" long
Sleeve gusset: 6" square
Neck Gusset: 3" square
Collar: 16" x 5"
Cuffs: 8.5" x 3"

I purposely did not cut ruffles. If I choose to add them, they often would have been cut from a nicer material than the rest of the shirt, and I was so limited on fabric. These measurements include 1/2" seam allowances. (But for real, if you struggle with creating a pattern, JP Ryan's habit shirt pattern is wonderful!!)

I know I started the reasearch while I was on vacation in early June, but I don't think I actually got started until after I got home again. While on vacation, I took the sleeves off of my shift and narrowed and shortened them. Some of the habit shirt pieces got cut out of the those scraps. Sewing with linen is so lovely, so I opted to do it all by hand. Everything was going well, and in early July I thought I actually had a chance at having it ready and wearable for Costume College!

Until... I put in the neck gussets upside down. I had folded the little gusset squares in half and attached the raw edges to my neck slits, opted not to flat-fell the seams, gathered the neckline and attached it to the collar, AND sewn the collar down. I figured that the seams would be on the inside, and then I could flat-fell them down after CoCo. When I went to try it on, that's when I noticed that the raw seams faced UP for the whole world to see. Argh! I also wasn't happy with the fit -- I'd made a channel for the back waist to gather through, which made it feel weird around the shoulders and center back, and made it ridiculously short (the tie would have gone VERY high around my torso), plus one cuff was a lot bigger than the other. I was discouraged and put it in the Naughty Pile. I took a modern dress shirt to CoCo for my habit class instead.

While at CoCo, I picked up JP Ryan's habit shirt pattern in the marketplace. She'd had a couple on display and one for sale that was purchased by another attendee, and they were all BEAUTIFUL, so I wanted to pick it up if I could. Exchange rates were still terrible, but at least I didn't have to pay for shipping, and guaranteed no customs fees! I read the directions a few times, intending to get more linen and start over, all while thinking that my original attempt could be salvaged for something else.

Sometimes it's lucky that it takes me forever to decide on stuff. Finally, towards the end of 2017, I decided that I really wanted to put some serious thought into getting the riding habit done. I'd picked up some quilted silk in LA to make into a petticoat (done in September), to wear under the habit petticoat, and while I could get the petticoat done as soon as I find the fabric in my stash, I still needed the habit shirt done before I could commit to fitting the waistcoat or jacket.

And then it kinda fits into this month's Historical Sew Monthly 2018. I WAS going to relegate this project to "salvage fabric", but then concluded that I could just... mend it. Take apart the offending fit issues and re-shape it, the right way. And so I did.


The pieces came off very easily - hooray for handsewing! I even could have salvaged most of the thread (I didn't, but I could have). The collar, neck gussets, back hem, and longer cuff were all removed within an hour. I made sure to put the neck gussets on the proper side, and this time flat-felled them down. I reused my gathering thread to gather the neckline back onto the collar, and finished that area up. The back got its small seam allowance turned in and tacked down, and some small pleats taken at the centre back to narrow it a bit. That will get tacked to a tie when I can pick up some narrow twill tape. Finally, I cut almost 2" off the cuff (what was I thinking the first time??) and reattached that. All told, the alterations took 3 hours of hand sewing time to reattach, and I was back to where it had been when it went on the naughty pile.

Next up I had to figure out my button situation. JP Ryan and her assistant, Feather, had had some pre-made Dorset buttons for sale at the class, but I had lacked any cash to buy them. They can be purchased from Wm, Booth, Draper, but for a variety of reasons, this isn't an option right now. I couldn't bring myself to use modern plastic buttons, I just couldn't. So I looked up how to make Dorset buttons and made some, using modern embroidery floss and the rings that I had pulled off of the tie-backs that had come with the curtains for my curtain-along dress. The rings were just slightly larger than the 1/2" ones recommended by JP Ryan, so I went with it. I used this tutorial to create them. I had trouble getting 8 even spokes around the ring, but I ended up liking the odd-number spoked buttons better. Each button took around 20 minutes to make (timed while I was watching Forensic Files -- one button per episode).


Finally, I made buttonholes on the cuffs and collar of the shirt, and attached my buttons. Aside from the tie and some kind of cravat or stock, my habit shirt is complete!


2017 Year in Review

I didn't really sew a lot this past year. I'm not that surprised, I had a rather busy year! Between taking care of my mental health, a new position at work, and other various events, I ended up knitting more than sewing. I've included a couple of major projects here.


Mid-Victorian chemise and drawers


Blue Regency Gown


18th century petticoats


Miramar Dress and Wonder Unders slip


NutMeg Sews' Pineapple Reticule


Victorian Tea Gown


1780s stays


IKEA LJUSOGA Italian Gown


Star Trek TOS Season 3 Skant


18th Century Cap


Finished Curtain-Along Gown


Quilted Petticoat


Taylor Mitts


Petticoat for Pocket Hoops


Salal Sweater


1780s Split Rump


Wednesday, January 3, 2018

Victorian Tea Gown (1882)

I got a bee in my bonnet to make a tea gown 'round about June. I thought it would be great for comfy Sunday wear at Costume College. I was right :D


This was a very straightforward make from Truly Victorian. I made my usual adjustment to the bust area (removing roughly 3"), and lowered the necklines just a tad (half an inch or so). I remembered seeing a gorgeous tea gown made in the curtain-along fabric on Festive Attyre's round-up, so I used a similar looking print for mine, liberated from my mum's fabric stash in early 2014:


It's a very standard weight quilting cotton, and I have TONS of it, which is great because I love it.

This came together in just a few days. The bodice and hem are lined with a medium-weight natural linen. I polled my Facebook and Instagram feeds for button options. The three colours I had the most of from my Gramma's button stash each had their cheerleaders, but I went with brown.


I put the buttonholes too far into the gown and so had to put the buttons on the very edge of the front seam. Something I will keep in mind for my next Victorian make. Buttons and facings got sewn while watching Downton Abbey, and I had SO MANY pins for the facing that I got to make tons of flowers in my pin cushion!


The back neckline did not get a facing, and instead was covered by self bias-tape. I used a whole yard to make the tape, so I have a ton of that now too.

I haven't put darts into the bodice yet, because I'm still undecided on the fit! Without darts, the gown fits my uncorseted body perfectly (so great for lazy Sunday wear!), but if I want to wear a corset, I would need darts to fit it better. Hard choices! It also needs some trimming. The fabric is so busy, but I found this wonderful tea gown at the Met that would be perfectly matched to this gown. (oooh now that I'm looking at it again, I really wanna get started on putting that gorgeous trim on!)

On Sunday I wore it with a cami and leggings underneath, a petticoat (also by Truly Victorian), and accessorized with my pineapple reticule and the honeycomb shawl that I thought would be extra weight in my suitcase. It came in handy, as this was the least amount of layers I wore all weekend and I was cold!

1770's Riding Habit

I'm not precisely sure when I decided that I needed a riding habit, but once the idea was there, it needed to happen. It's been on ...